Tacking up a horse is one of those basic skills you need as an equestrian and something you will be doing hundreds of times during your horse-riding career. Like so many things in our daily routine at the barn, tacking up quickly becomes a habit where you have every move down to a tee, and it is easy to let small bad habits sneak in without even noticing.
This comprehensive guide for how to tack up a horse is aimed at new riders to help them develop good habits and routines and gives an in-depth step-by-step approach for tacking up (and off) and address the most commonly asked questions around tacking up a horse.
What is Horse Tack?
Tack is an umbrella term for all the equipment you put on your horse before riding and usually entails a saddle and saddle pad, bridle and in some cases a martingale or tail crupper.
Step 1 – Prepare all Your Equipment
Before fetching the horse from his stall or the paddock, take a moment to prepare all your equipment. Place the grooming kit, saddle, bridle and other gear you will need in a place where you can easily reach it and where the horse cannot. Make sure it is not placed anywhere people or horses may trip over it.
Step 2 – Securely Attach the Horse
Put a halter on the horse and either attach him in crossties or secure him with a lead rope using a quick-release knot. Make sure that what you tie him to is solid and can withstand some pulling. A quick-release knot is great because in an emergency situation (if the horse panics), all you need to do to release the horse is pull the end of the lead rope. If you don’t know how to tie this type of knot, the below video provides a great demo.
The lead rope should be attached above shoulder height (of the horse) and give a little slack, but not enough to put his head all the way to the ground as that means he could theoretically get his legs tangled in it.
The more space you have around your horse, the better. Also, if you are close to other horses (for instance if you are sharing a tie post with others), make sure there is enough distance between your horse and the next one so they can’t kick or nip at each other.
Step 3 – Grooming the Horse
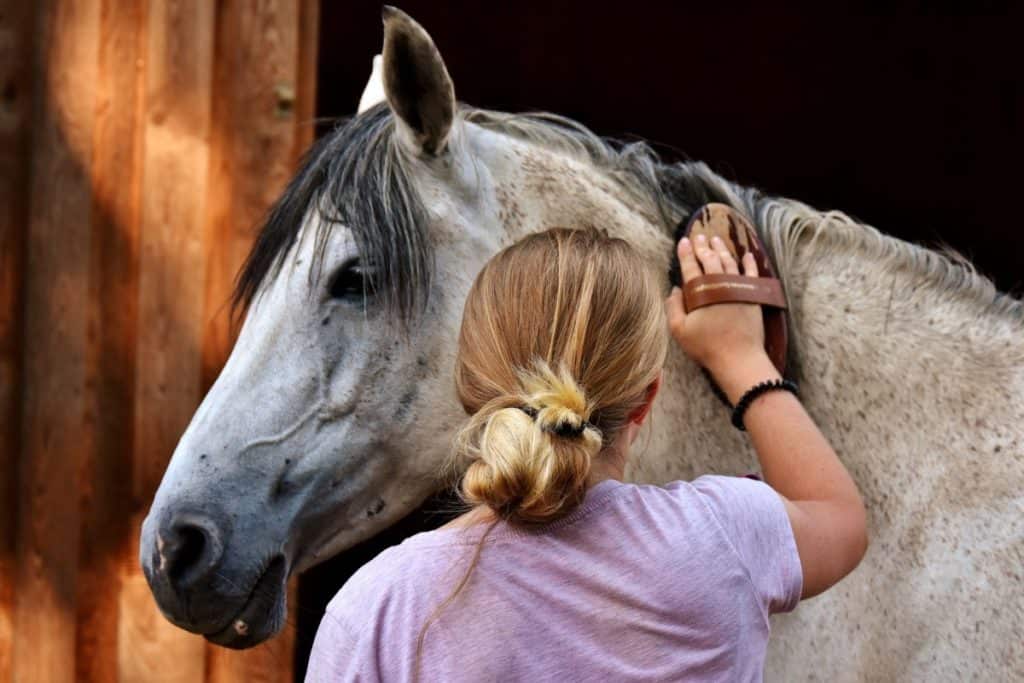
Grooming is an essential part of the tacking up routine. Not only does it get the horse clean and avoids any build-up of dirt that can rub and irritate the skin under the tack, but it also gets the blood circulation going and provides an opportunity to go over all parts of the horse to check for cuts, bites or any other irregularities.
We like to start the grooming session by picking out the hooves. Horses most frequently have issues with their legs and feet and this way you can quickly uncover any problems that may prevent you from riding that day.
Then over to the brushing, starting with SleekEz to remove all the loose hair (read all about why we LOVE SleekEZ here) and then a curry comb to bring the dirt up to the surface of the coat. Use circular motions in the direction of the hairs and be very gentle on boney areas. Then follow up with a hard brush and then a soft brush. Finally, carefully brush and wipe off the face and if needed, gently brush through the tail and mane.
For more details and an in-depth look at why and how to groom, check out our comprehensive guide on How to Groom a Horse.
Step 4 – Saddling Up
When the grooming is done, you are ready to start saddling the horse. We always start with the saddle so we can keep the horse securely attached for as long as possible.
Usually, the stirrups should already be run up and the girth tucked into the right stirrup or detached completely and placed across the saddle.
Placing the Saddle Pad

Start by putting the saddle pad on the horses’ back. Place it slightly forward past the withers and slide it back into place to ensure all the hairs are pulled in the right direction and the mane is not caught underneath. Some horses may require additional padding and use half pads that are then placed on top of the saddle pad. Whether this protection is needed depends on the saddle used, the horse’s particular anatomy and the level of impact the riding activity might put on its back.
Saddle pads have one girth strap on either side to slide the girth through, which helps the saddle pad stay in place.
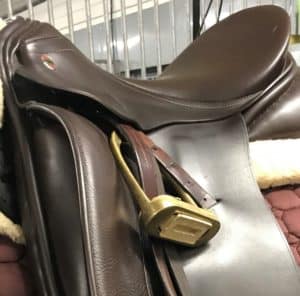
Putting on the Saddle
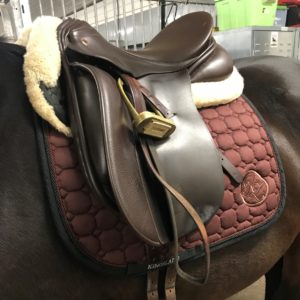
Then, gently place the saddle on top of the saddle pad (or half pad) and make sure the pommel is placed just behind the withers. It can be challenging to put on a saddle, especially if you are dealing with a big horse or one that doesn’t want to stand still. It is, however, important to find a technique that allows you to lift the saddle high enough to place it correctly, and simultaneously be delicate with the horse’s back. We often see beginners try to use momentum and ‘throw’ the saddle on, which can result in a surprised or irritated horse. In this case, it might be a better idea to either ask for help or use a mounting block or something else to stand on to make it easier for you to use the correct technique.
Once the saddle is on, carefully try to wiggle it a little to see if it is placed correctly and doesn’t move around. Once the saddle is positioned in the right place it is time to fasten the girth. Depending on the type of saddle and how the equipment is stored, the girth can either be entirely detached from the saddle or attached on the right side and secured by being looped into the stirrup.
Go to the right side of the horse and attach and gently release the girth so it hangs straight down along the horses’ side. Walk back to the left side and pull the girth towards you and attach it loosely to the girth straps. You will tighten the girth again before mounting, so for now only tighten it enough to secure the saddle so it does not slide anywhere. Some horses fill their bellies with air to make it difficult for you to attach the girth. If so, just wait until the air is released and then gently tighten.
If you are using a martingale, attach it to both sides of the saddle and slide the loop between the front legs and onto the girth before you attach it to the girth straps.
Where Should the Girth be On a Horse?
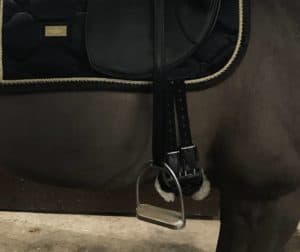
The girth goes under and around the stomach of the horse. It is attached to the girth straps in either end and usually, the girth should be placed about a hands width away from the elbow. In this position, it will keep the saddle in place without rubbing the elbow or sternum. Depending on the saddle, the girth could be attached under the saddle flap or lower down under the edge of the flap (usually the case for dressage saddles).
Adding Leg Protection
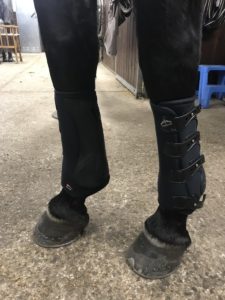
Depending on the riding activity and the horse, adding leg boots is sometimes advisable. Jumping is one of those activities where leg boots are great to protect from bumping into the obstacles. The boots also protect the fragile tendons and ligaments in the legs from injury.
If you are in the market for leg protection, read about why we recommend the Piaffe REVO Dressage Boots here.
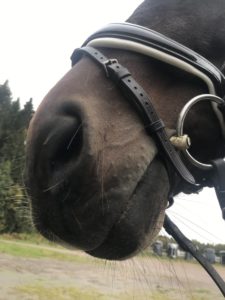
Step 5 – Putting on the Bridle
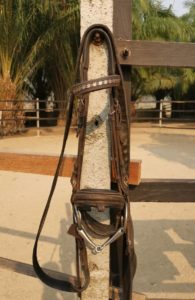
The bridle is the piece of equipment that goes on the horse’s head. There are many varieties of bridles and their make will depend on the horse, his mouth and the preference of the rider. Usually, however, a bridle will comprise a bit that goes in the horse’s mouth, the reins that the rider holds on to and the different straps and pieces holding it together. Below you can see the classic pieces of an English style bridle.
Before fetching the bridle, we recommend you get yourself ready to ride so that once the bridle is on you can go straight to the arena or where you will mount the horse. So put on your helmet, gloves, boots or whatever else you need and then get the bridle.
How to Put on a Bridle

Unless you are riding with the halter underneath the bridle (which is sometimes useful if you are going on longer trail rides where you will stop and take breaks for instance) you will need to remove it in order to put on the bridle. However, unless you know the horse very well, you should still make sure he is securely attached.
Open the buckle on the left side of the horse’s head and lower the halter slightly so the horses’ nose is released and then close the buckle back up with the halter now around the horse’s neck. This way, the horse is still attached so you don’t need to worry about keeping him in place while bridling him.
Putting on a bridle can be a bit tricky if you are not used to it or if your horse is large and not cooperative.
First, pull the reins over the head and leave them resting on the horses’ neck. Then, grab the headpiece and noseband with your right hand and lift them up and place your arm gently between the ears of the horse.
Place the bit in the palm of your left hand and guide it gently into the horses’ mouth by pulling the bridle slowly upwards with your right hand as the horse opens his mouth. Make sure not to use any force or allow the bit to put pressure on the teeth.
If he does not accept the bit at first, try to slide your thumb into the corner of his mouth (where there are no teeth) to encourage him to open. If that doesn’t work, you can also try to flavor the bit with something the horse likes, such as peppermint oil or molasses.
Once the mouth is open, pull the headpiece up and place it first behind the far ear and then the one closest to you. Make sure to pull the forelocks through so they are neatly placed over the browband.
Then it is time to attach the noseband and throat latch. The noseband should be done up so you can still place two fingers between the band and the horse’s lower jaw. The throat latch should be done up quite loosely and you should be able to fit a flat hand horizontally between the strap and the horse’s chin.
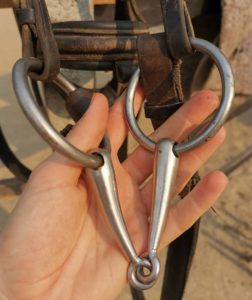
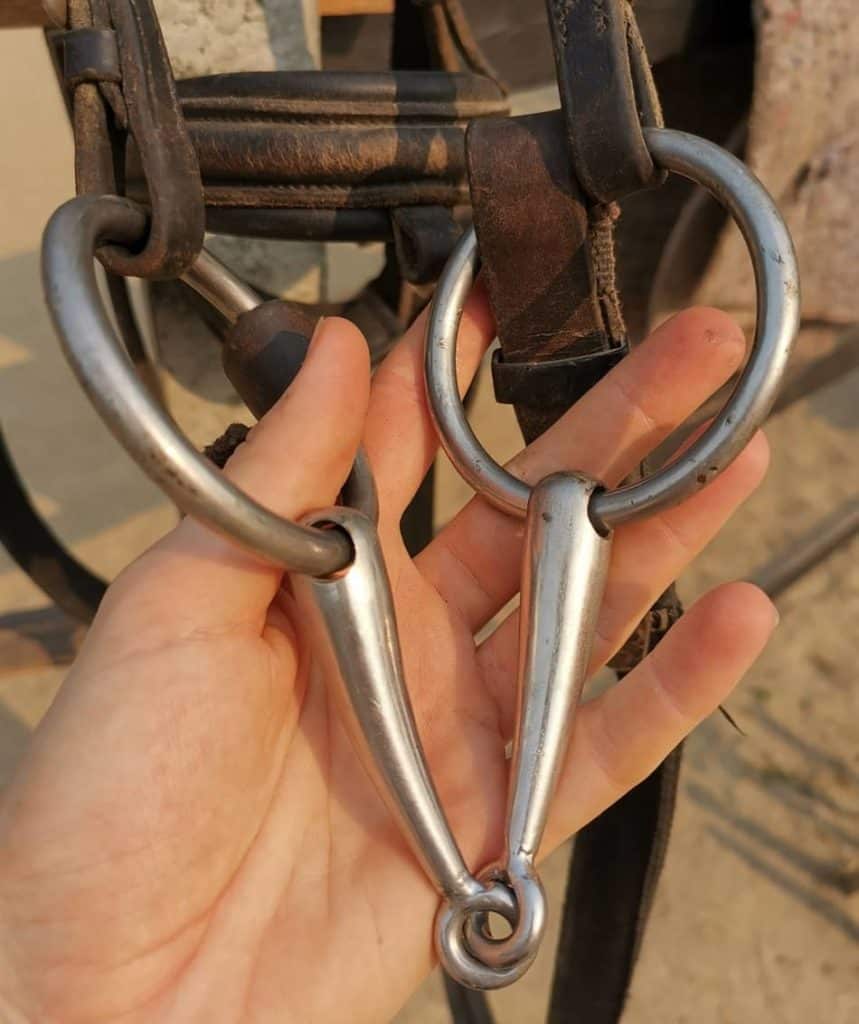
Why Do We Use Bits on Horses?
The bit is the piece connected to the reins that allow a rider to give the horse ques for speed and direction. There are many different types of bits depending on the style of riding, the horses’ training, the level of experience of the rider as well as other factors.
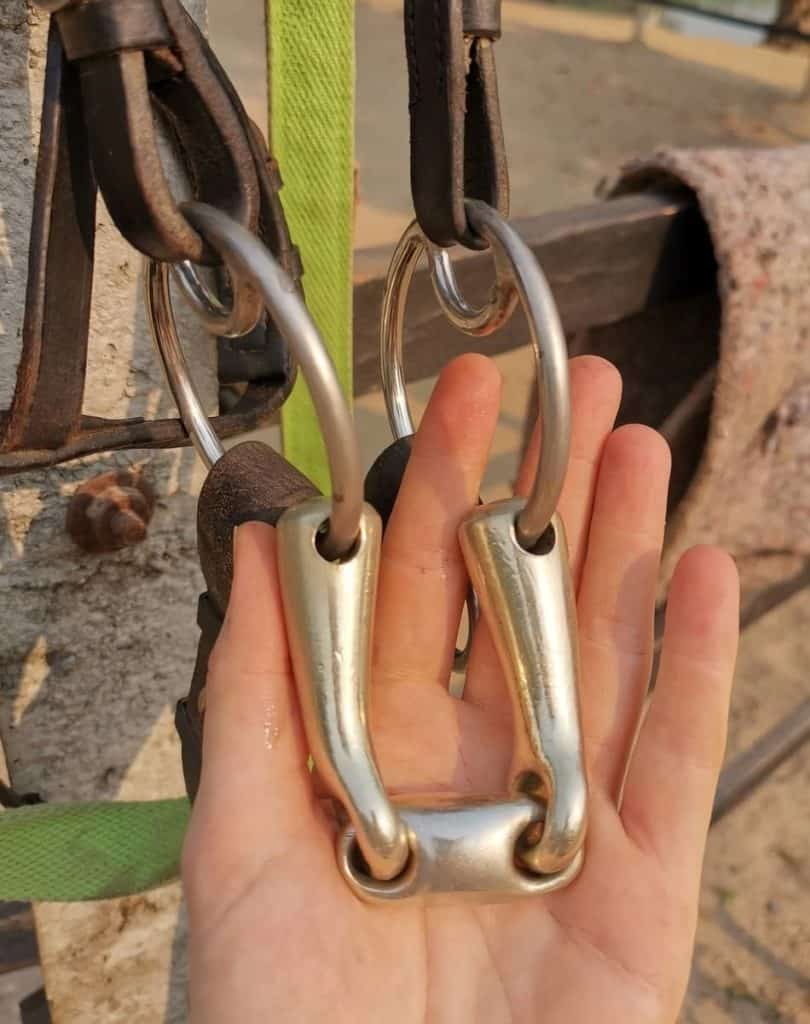
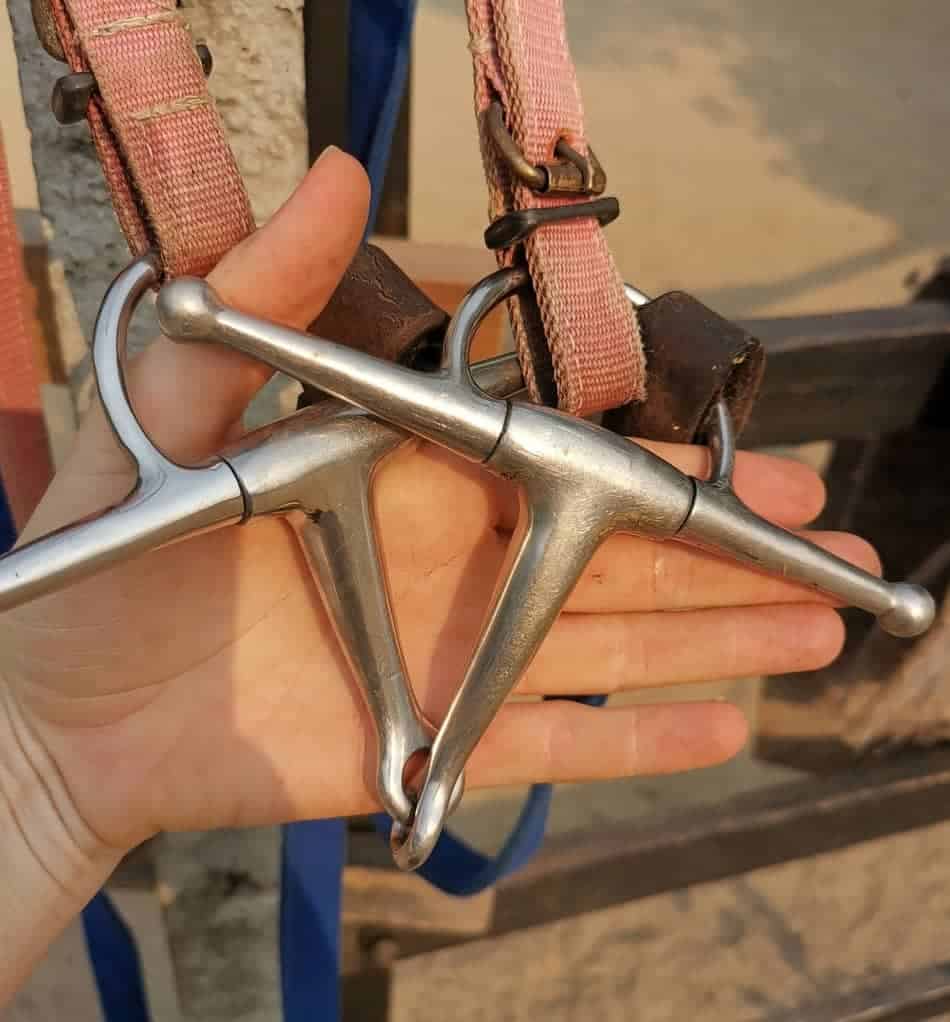
Especially in Western-style riding, there are also bridles without a bit (such as the hackamore) where pressure is applied to the nose, under the chin and behind the ears instead of in the mouth.
How to Make a Horse Take a Bit
Some horses do not like taking the bit and it can be difficult to know exactly why. Here are some of the more common reasons some horses may oppose taking the bit.
Mouth sores or dental issues
If the horse has sore gums or any issues with his teeth, opening or having a bit in his mouth can feel uncomfortable or painful. If your horse normally takes the bit easily and one day doesn’t, the likelihood that he has pain in his mouth is high. See if you can identify any issues yourself or call an equine dentist to give the horse a check-up. Do not force a horse that may have mouth issues to take the bit, as this could further exacerbate the problem and could even put you in danger if the horse tries to throw you off due to the pain.
Bad experiences in the past
As with anything else, if the horse has had one or several bad experiences with the bit in the past, he is not going to take it willingly. Maybe his past owner forced it into his mouth or tapped it against his teeth. Or perhaps he associates being ridden as something negative all together and therefore doesn’t like being tacked up because he expects an uncomfortable situation to follow.
The bit is attached the wrong way
If you are using a two-jointed snaffle bit, it could happen that after taking the bridle apart to clean it, the bit is put back on the wrong way. In this case, the bit will not fold together properly which is uncomfortable for the horse and he may even end up getting his tongue pinched between the two jointed mouthpieces.
The bit is cold
In the winter, metal gets cold. How would you like to have a cold piece of metal being pushed into your mouth? Yeah, me neither! Take the time to warm up the bit either under some warm running water or in your hands. Your horse will definitely appreciate it!
Disobedience or lack of respect
If none of the above applies, then it may just be that your horse is a little bit of a brat..
Yes, horses can also lack manners and in that case, some time will be needed to train him to respect you and do as you say. If the main problem is him moving his head up or away from you (which we have seen again and again especially in school horses), then perhaps start by training him to lower his head. Below is a great video that shows you how to do that.
Step 6 – Untacking the Horse
Once you are done riding, it is time to reverse the process. Before getting off the horse, loosen the girth a little during cool down and once you have dismounted, run up the stirrups by sliding it up the inside strap all the way to the top. Hold the stirrup in place with your left hand and pull the loop through the stirrup so they stay in place.
How do you Remove a Horse’s Bridle?
Start again by attaching the horse with the halter around his neck and then proceed to undo the throat latch and noseband. Slide the reins up to the headpiece and pull them both off the head and ears, which will then release the bit. Lower the bit slowly so the horse has time to open his mouth to avoid it knocking on his teeth. Make sure to rinse the bit before putting the bridle away. If the horse has been sweating, you may want to give it a quick wipe as well.
Once the bridle is off, put the halter back on properly on the horse’s head so he is securely attached.
How Do You Take a Saddle Off a Horse?
First, detach the girth from the girth straps on the left side. Make sure to hold on to the girth while you do it, so it doesn’t swing down and smack against the horses’ legs. Move to the other side and pull the girth towards you. If it is long enough, it can be placed on top of the saddle or if not, looped into the stirrup. However, for the durability of the equipment, it is best to detach the girth completely and keep it separate. After the girth is dry, use a clean brush to remove any hair that might be stuck to it.
Final Grooming
After the tack has been removed it is time for another grooming session to get rid of the sweat and dirt that has accumulated during the ride. If the horse is very sweaty (and the temperature allows for it), a quick rinse can be a nice way to cool him down and get rid of the sweat. Otherwise, go through the grooming steps one more time.
There you go! Tacking up and untacking all wrapped up in a bow! We hope you got all your questions answered and that you find your own groove very soon.
Behind Horse Learner are two passionate horse enthusiasts. One horse owner and competitive dressage rider and one horse riding adventure traveler. Between then they have more than 40 years of experience with horses and horses and horse riding.